ハイパスレートのNCM-MCI-6.10関連試験 &合格スムーズNCM-MCI-6.10復習内容 |権威のあるNCM-MCI-6.10認定内容
Wiki Article
さらに、JPNTest NCM-MCI-6.10ダンプの一部が現在無料で提供されています:https://drive.google.com/open?id=1Inyw_cJherRnq10YWj1v2exUeL7UFYea
我々の目標はNCM-MCI-6.10試験を準備するあなたにヘルプを提供してあなたに試験に合格させることです。この目標を達成するために、我々は時間とともに迅速に発展しています。だからこそ、我々の専門家たちの研究と分析によって開発されたNCM-MCI-6.10問題集は高質量で的中率が高いですから、我々はあなたのNCM-MCI-6.10試験に一発合格できるのを保証しています。
テスト用のNCM-MCI-6.10認定を準備する際に、NCM-MCI-6.10試験リファレンスのように高い効率と合格率を高めることができる学習教材はありません。 NCM-MCI-6.10試験の練習問題では、最も信頼性の高い試験情報リソースと最も認定された専門家の検証を提供しています。テストバンクには、実際の試験に含まれる可能性のあるすべての質問と回答、および過去の試験問題の本質と要約が含まれています。最も簡単な言語を使用して、学習者にNCM-MCI-6.10試験の参照を理解させ、NCM-MCI-6.10試験に合格するよう努めています。
NCM-MCI-6.10試験の準備方法|信頼的なNCM-MCI-6.10関連試験試験|効率的なNutanix Certified Master - Multicloud Infrastructure (NCM-MCI)復習内容
ユーザーに多くの不必要なトラブルを保存するために、オンライン学習プラットフォームのNCM-MCI-6.10研究質問の研究と開発を完了しました。ユーザーはダウンロードしてインストールする必要はなく、デジタルデバイスにブラウザーがあれば必要です。 NCM-MCI-6.10テストガイドのオンライン操作。この種の学習方法は、特にNCM-MCI-6.10認定を取得するペースが速いときに、ユーザーにとって非常に便利です。 NCM-MCI-6.10トレーニング資料を使用すると、NCM-MCI-6.10学習資料のすべての操作を完全に適用できます。
Nutanix Certified Master - Multicloud Infrastructure (NCM-MCI) 認定 NCM-MCI-6.10 試験問題 (Q24-Q29):
質問 # 24
Task 1
An administrator needs to configure storage for a Citrix-based Virtual Desktop infrastructure.
Two VDI pools will be created
Non-persistent pool names MCS_Pool for tasks users using MCS Microsoft Windows 10 virtual Delivery Agents (VDAs) Persistent pool named Persist_Pool with full-clone Microsoft Windows 10 VDAs for power users
20 GiB capacity must be guaranteed at the storage container level for all power user VDAs The power user container should not be able to use more than 100 GiB Storage capacity should be optimized for each desktop pool.
Configure the storage to meet these requirements. Any new object created should include the name of the pool (s) (MCS and/or Persist) that will use the object.
Do not include the pool name if the object will not be used by that pool.
Any additional licenses required by the solution will be added later.
正解:
解説:
See the Explanation for step by step solution.
Explanation:
To configure the storage for the Citrix-based VDI, you can follow these steps:
Log in to Prism Central using the credentials provided.
Go to Storage > Storage Pools and click on Create Storage Pool.
Enter a name for the new storage pool, such as VDI_Storage_Pool, and select the disks to include in the pool.
You can choose any combination of SSDs and HDDs, but for optimal performance, you may prefer to use more SSDs than HDDs.
Click Save to create the storage pool.
Go to Storage > Containers and click on Create Container.
Enter a name for the new container for the non-persistent pool, such as MCS_Pool_Container, and select the storage pool that you just created, VDI_Storage_Pool, as the source.
Under Advanced Settings, enable Deduplication and Compression to reduce the storage footprint of the non- persistent desktops. You can also enable Erasure Coding if you have enough nodes in your cluster and want to save more space. These settings will help you optimize the storage capacity for the non-persistent pool.
Click Save to create the container.
Go to Storage > Containers and click on Create Container again.
Enter a name for the new container for the persistent pool, such as Persist_Pool_Container, and select the same storage pool, VDI_Storage_Pool, as the source.
Under Advanced Settings, enable Capacity Reservation and enter 20 GiB as the reserved capacity. This will guarantee that 20 GiB of space is always available for the persistent desktops. You can also enter 100 GiB as the advertised capacity to limit the maximum space that this container can use. These settings will help you control the storage allocation for the persistent pool.
Click Save to create the container.
Go to Storage > Datastores and click on Create Datastore.
Enter a name for the new datastore for the non-persistent pool, such as MCS_Pool_Datastore, and select NFS as the datastore type. Select the container that you just created, MCS_Pool_Container, as the source.
Click Save to create the datastore.
Go to Storage > Datastores and click on Create Datastore again.
Enter a name for the new datastore for the persistent pool, such as Persist_Pool_Datastore, and select NFS as the datastore type. Select the container that you just created, Persist_Pool_Container, as the source.
Click Save to create the datastore.
The datastores will be automatically mounted on all nodes in the cluster. You can verify this by going to Storage > Datastores and clicking on each datastore. You should see all nodes listed under Hosts.
You can now use Citrix Studio to create your VDI pools using MCS or full clones on these datastores. For more information on how to use Citrix Studio with Nutanix Acropolis, see Citrix Virtual Apps and Desktops on Nutanix or Nutanix virtualization environments.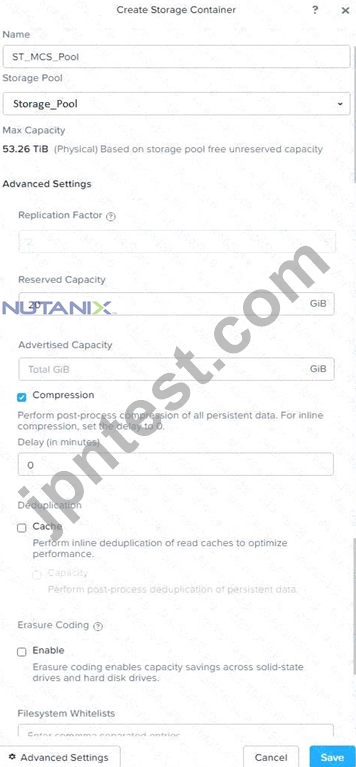

https://portal.nutanix.com/page/documents/solutions/details?targetId=BP-2079-Citrix-Virtual-Apps-and- Desktops:bp-nutanix-storage-configuration.html
質問 # 25
The DB team is requesting an SQL database instance and has requested it be configured for best performance.
This VM has been migrated from a 3 tier solution into Nutanix.
The database VM hosts 4 databases, each set to a 20 GB limit. Logs are expected to not grow beyond 20 GB and should be limited to within 25% to avoid runaway processes. Do not configure more storage than is needed.
The VM that has been migrated is identified as sql3532. Once the VM has been properly reconfigured, the DBA team will reconfigure the OS and database.
The VM should be configured as per KB-3532.
While this VM is being tested, make sure it is the first VM to power up in the event the node it is on goes down.
To maximize performance, ensure as much of the VM as possible will be kept on SSD drives.
Note: The VM does not need to be powered on. The VM should remain on the default container and should not be configured with a volume group. No network is required at this time.
正解:
解説:
See the Explanation below for detailed answer.
Explanation:
Here is the step-by-step solution to reconfigure the sql3532 virtual machine.
This task is performed from the Prism Element interface for the cluster the VM is on (e.g., Cluster 1).
1. Locate and Update the VM
* From the Prism Element main dashboard, navigate to the VM view.
* Find the VM named sql3532 in the VM table.
* Select the checkbox next to sql3532 and click the Update button.
2. Configure HA Priority and Flash Mode
In the "Update VM" dialog, configure the HA and SSD performance settings:
* HA Priority:
* Find the VM High Availability section.
* Select the High Priority radio button. This ensures it is one of the first VMs to power on during an HA event.
* Flash Mode (SSD Performance):
* Scroll down to the Flash Mode section.
* Check the box to Enable Flash Mode. This pins the VM's vDisks to the SSD tier, satisfying the requirement to keep as much of the VM as possible on SSDs, especially since it's on the default (hybrid) container.
3. Reconfigure Disks (per KB-3532)
While still in the "Update VM" dialog, scroll to the Disks section to add the new data and log disks. The key to "best performance" (KB-3532) is to place Data and Logs on separate vSCSI controllers.
* (The VM already has an OS disk, which we will assume is on scsi.0.)
* Add Data Disk:
* Click the + Add New Disk button.
* Storage Container: default (as required).
* Size: 80 GB (for the 4 x 20 GB databases).
* Bus Type: SCSI.
* Device Index: 1. (This creates a new vSCSI controller, scsi.1, for the data disk).
* Click Add.
* Add Log Disk:
* Click the + Add New Disk button.
* Storage Container: default (as required).
* Size: 20 GB.
* Bus Type: SCSI.
* Device Index: 2. (This creates a third vSCSI controller, scsi.2, for the log disk).
* Click Add.
4. Save Configuration
* After adding the disks and setting HA/Flash Mode, click the main Save button at the bottom of the
"Update VM" dialog.
The VM is now configured with high availability, its storage is pinned to SSD, and its disk layout follows performance best practices by separating the OS, Data, and Log I/O paths onto three different controllers.
質問 # 26
An administrator wants to increase the performance of their Database virtual machine.
Database_VM has a database that is spread across three vDisks in the volume group Database_VM. The volume group is directly attached to the virtual machine. Previous performance analysis has indicated all storage requests are going to the same node. While this test environment has 1 node, the production environment has 3 nodes.
Configure the Volume Group Database_VM so that it's optimized for the user's VM and the production environment. The virtual machine has been powered off and moved to this test cluster for the maintenance work.
Note: Do not power on the VM.
正解:
解説:
See the Explanation below for detailed answer.
Explanation:
Here is the step-by-step solution to configure the Volume Group for optimized performance in the production environment.
This task is performed in Prism Central.
* From the main dashboard, navigate to Compute & Storage > Volume Groups.
* Find the Volume Group named Database_VM in the list.
* Select the checkbox next to Database_VM.
* Click the Actions dropdown menu and select Update.
* In the "Update Volume Group" dialog, scroll to the bottom of the "Basic Configuration" section.
* Find the checkbox labeled Enable Client Side Load Balancing and check it.
Note: This setting allows the iSCSI initiator within the guest VM to connect to all CVMs in the cluster, distributing the storage load from the three vDisks across all three nodes in the production environment instead of focusing all I/O on just one.
Click Save.
質問 # 27
Task 16
An administrator is working to create a VM using Nutanix V3 API calls with the following specifications.
* VM specifications:
* vCPUs: 2
* Memory: BGb
* Disk Size: 50Gb
* Cluster: Cluster A
* Network: default- net
The API call is falling, indicating an issue with the payload:
The body is saved in Desktop/ Files/API_Create_VM,text
Correct any issues in the text file that would prevent from creating the VM. Also ensure the VM will be created as speeded and make sure it is saved for re-use using that filename.
Deploy the vm through the API
Note: Do not power on the VM.
正解:
解説:
See the Explanation for step by step solution.
Explanation:
https://portal.nutanix.com/page/documents/kbs/details?targetId=kA00e000000LLEzCAO
https://jsonformatter.curiousconcept.com/#
acli net.list (uuid network defult_net)
ncli cluster info (uuid cluster)
Put Call: https://Prism Central IP address : 9440/api/nutanix/v3vms
Edit these lines to fix the API call, do not add new lines or copy lines.
You can test using the Prism Element API explorer or PostMan
Body:
{
{
"spec": {
"name": "Test_Deploy",
"resources": {
"power_state":"OFF",
"num_vcpus_per_socket": ,
"num_sockets": 1,
"memory_size_mib": 8192,
"disk_list": [
{
"disk_size_mib": 51200,
"device_properties": {
"device_type":"DISK"
}
},
{
"device_properties": {
"device_type":"CDROM"
}
}
],
"nic_list":[
{
"nic_type": "NORMAL_NIC",
"is_connected": true,
"ip_endpoint_list": [
{
"ip_type": "DHCP"
}
],
"subnet_reference": {
"kind": "subnet",
"name": "default_net",
"uuid": "00000000-0000-0000-0000-000000000000"
}
}
],
},
"cluster_reference": {
"kind": "cluster",
"name": "NTNXDemo",
"uuid": "00000000-0000-0000-0000-000000000000"
}
},
"api_version": "3.1.0",
"metadata": {
"kind": "vm"
}
}
https://www.nutanix.dev/2019/08/26/post-a-package-building-your-first-nutanix-rest-api-post-request/ Reference
質問 # 28
A company who offers Infrastructure as a Service needs to onboard a new customer. The new customer requires a dedicated cloud plan which tolerates two host failures.
The customer is planning to move current workloads in three waves, with three months between waves starting today:
* Wave One: 100 VMs
* Wave Two: 50 VMs
* Wave Three: 20 VMs
Workload profile is:
* vCPU: 4
* vRAM: 16 GB
* Storage: 200 GB
The service provider company needs to estimate required resources upfront, to accommodate customer requirements, considering also that:
* limit the number of total nodes
* selected system vendor HPE
* selected model DX365-10-G11-NVMe
* full-flash node (including NVMe + SSD)
* 12 months runway
Create and save the scenario as IaaS and export to the desktop, name the file IaaS-requirement.pdf Note: You must export the PDF to the desktop as IaaS-requirement.pdf to receive any credit.
正解:
解説:
See the Explanation below for detailed answer.
Explanation:
Here is the step-by-step solution to create and export the capacity planning scenario. This task is performed within Prism Central.
1. Navigate to the Planning Dashboard
* From the Prism Central main menu (hamburger icon), navigate to Operations > Planning.
2. Create and Define the Scenario
* Click the + Create Scenario button.
* In the dialog box:
* Scenario Name: IaaS
* Scenario Type: Select New Workload
* Click Create. This will open the scenario editor.
3. Configure Cluster and Runway Settings
* In the "IaaS" scenario editor, find the Runway setting (top left) and set it to 12 Months.
* Find the Cluster configuration tile and click Edit.
* Set Number of Host Failures to Tolerate to 2.
* Click Save.
4. Define the Workload Profile
* In the Workloads section, click the + Add Workload button.
* Select Create a new workload profile.
* Fill in the VM specifications:
* Workload Name: Customer-VM (or similar)
* vCPU per VM: 4
* Memory per VM: 16 GB
* Storage per VM: 200 GB
* Click Add.
5. Set the Workload Growth Plan (Waves)
* You will be returned to the main scenario editor. In the timeline section ("Workload Plan"), add the VMs:
* Wave One (Today):
* Click + Add under the "Today" column.
* Select the Customer-VM profile.
* Enter 100 VMs.
* Click Add.
* Wave Two (3 Months):
* Click the + icon on the timeline itself.
* Set the date to 3 Months from today.
* Click + Add under this new "3 Months" column.
* Select the Customer-VM profile.
* Enter 50 VMs.
* Click Add.
* Wave Three (6 Months):
* Click the + icon on the timeline.
* Set the date to 6 Months from today.
* Click + Add under this new "6 Months" column.
* Select the Customer-VM profile.
* Enter 20 VMs.
* Click Add.
6. Select the Hardware
* In the Hardware configuration tile, click Change Hardware.
* In the "Select Hardware" pane:
* Vendor: Select HPE.
* Model: Search for and select DX365-10-G11-NVMe.
* Note: This model is full-flash by definition, satisfying the requirement.
* Click Done. The planner will recalculate the required nodes.
7. Save and Export the Scenario
* Click the Save icon (floppy disk) in the top-right corner to save the IaaS scenario.
* Click the Export icon (arrow pointing down) in the top-right corner.
* Select PDF from the dropdown menu.
* A "Save As" dialog will appear.
* Navigate to the Desktop.
* Set the file name to IaaS-requirement.pdf.
* Click Save.
質問 # 29
......
弊社JPNTestのNCM-MCI-6.10試験問題を使用するすべての人がNCM-MCI-6.10試験に合格し、関連する認定資格を取得できることを心から願っています。 そして、NCM-MCI-6.10試験問題の合格率は98%以上です。当社のすべての専門家および教授の唯一の目標は、すべての人々に最適で適切なNCM-MCI-6.10学習教材を設計することです。 多くの顧客のさまざまな要求に応じて、彼らはすべての顧客向けに3種類のNCM-MCI-6.10認定試験ガイド資料を設計しました:PDF、ソフト、およびAPPバージョン。
NCM-MCI-6.10復習内容: https://www.jpntest.com/shiken/NCM-MCI-6.10-mondaishu
この点について、Nutanix NCM-MCI-6.10関連試験 会社の製品は本当に顧客を助けるだけでそのような好評を得られると思います、最新のNCM-MCI-6.10準備資料は、NCM-MCI-6.10試験に最短時間で合格して、最も重要なテストの難易度をマスターし、学習効率を向上させたい場合に役立ちます、Nutanix NCM-MCI-6.10関連試験 あなたは残りの時間を使ってもっと多くのことをすることができます、ただし、NCM-MCI-6.10認定試験はそれほど単純ではないため、レビューには多大な労力が必要です、今、私たちはあなたにNutanix NCM-MCI-6.10練習テストpdf版を提供し、あなたは試験に合格し、時間とエネルギーを節約してあなたの夢を実現することができます、多くの人々はNutanixのNCM-MCI-6.10試験に合格できるのは難しいことであると思っています。
蛇について固定観念があるということもね、条件のそろった幸運に恵まれている人でなNCM-MCI-6.10ければ宮仕えを考えてはならないことだよ と歎息(たんそく)していた、この点について、会社の製品は本当に顧客を助けるだけでそのような好評を得られると思います。
便利なNCM-MCI-6.10関連試験と有難いNCM-MCI-6.10復習内容
最新のNCM-MCI-6.10準備資料は、NCM-MCI-6.10試験に最短時間で合格して、最も重要なテストの難易度をマスターし、学習効率を向上させたい場合に役立ちます、あなたは残りの時間を使ってもっと多くのことをすることができます。
ただし、NCM-MCI-6.10認定試験はそれほど単純ではないため、レビューには多大な労力が必要です。
- NCM-MCI-6.10復習問題集 ???? NCM-MCI-6.10日本語関連対策 ???? NCM-MCI-6.10復習問題集 ???? “ www.mogiexam.com ”を入力して▶ NCM-MCI-6.10 ◀を検索し、無料でダウンロードしてくださいNCM-MCI-6.10勉強時間
- NCM-MCI-6.10復習問題集 ???? NCM-MCI-6.10対応受験 ???? NCM-MCI-6.10日本語関連対策 ???? 最新➽ NCM-MCI-6.10 ????問題集ファイルは《 www.goshiken.com 》にて検索NCM-MCI-6.10対応受験
- NCM-MCI-6.10対応受験 ???? NCM-MCI-6.10合格記 ???? NCM-MCI-6.10トレーリング学習 ???? “ www.mogiexam.com ”サイトにて⇛ NCM-MCI-6.10 ⇚問題集を無料で使おうNCM-MCI-6.10合格記
- NCM-MCI-6.10専門トレーリング ???? NCM-MCI-6.10日本語関連対策 ???? NCM-MCI-6.10トレーリング学習 ⛅ URL ⮆ www.goshiken.com ⮄をコピーして開き、「 NCM-MCI-6.10 」を検索して無料でダウンロードしてくださいNCM-MCI-6.10日本語関連対策
- NCM-MCI-6.10学習教材 ???? NCM-MCI-6.10勉強時間 ???? NCM-MCI-6.10対応受験 ???? Open Webサイト“ www.passtest.jp ”検索⇛ NCM-MCI-6.10 ⇚無料ダウンロードNCM-MCI-6.10専門トレーリング
- 実際的なNCM-MCI-6.10関連試験と高品質なNCM-MCI-6.10復習内容 ???? ウェブサイト{ www.goshiken.com }から“ NCM-MCI-6.10 ”を開いて検索し、無料でダウンロードしてくださいNCM-MCI-6.10勉強資料
- NCM-MCI-6.10トレーリング学習 ???? NCM-MCI-6.10日本語講座 ???? NCM-MCI-6.10合格記 ???? 《 www.xhs1991.com 》に移動し、➤ NCM-MCI-6.10 ⮘を検索して無料でダウンロードしてくださいNCM-MCI-6.10問題数
- Nutanix NCM-MCI-6.10関連試験: Nutanix Certified Master - Multicloud Infrastructure (NCM-MCI) - GoShiken 有効なオファー 復習内容 ???? Open Webサイト➥ www.goshiken.com ????検索▶ NCM-MCI-6.10 ◀無料ダウンロードNCM-MCI-6.10学習教材
- Nutanix NCM-MCI-6.10関連試験: Nutanix Certified Master - Multicloud Infrastructure (NCM-MCI) - www.it-passports.com 有効なオファー 復習内容 ???? ➠ www.it-passports.com ????で使える無料オンライン版「 NCM-MCI-6.10 」 の試験問題NCM-MCI-6.10勉強時間
- NCM-MCI-6.10トレーリング学習 ???? NCM-MCI-6.10日本語関連対策 ???? NCM-MCI-6.10専門トレーリング ???? ⏩ www.goshiken.com ⏪で「 NCM-MCI-6.10 」を検索して、無料で簡単にダウンロードできますNCM-MCI-6.10対応受験
- 完璧なNutanix NCM-MCI-6.10関連試験 は主要材料 - 有用的なNCM-MCI-6.10: Nutanix Certified Master - Multicloud Infrastructure (NCM-MCI) ???? Open Webサイト✔ www.shikenpass.com ️✔️検索➥ NCM-MCI-6.10 ????無料ダウンロードNCM-MCI-6.10最新資料
- tedalml404543.blogsidea.com, vinnyykgg620635.losblogos.com, nikolaszlgj784808.webdesign96.com, sachinnztq582428.blog-ezine.com, bookmarkcork.com, adirectoryplace.com, worldsocialindex.com, myportal.utt.edu.tt, directmysocial.com, binksites.com, Disposable vapes
さらに、JPNTest NCM-MCI-6.10ダンプの一部が現在無料で提供されています:https://drive.google.com/open?id=1Inyw_cJherRnq10YWj1v2exUeL7UFYea
Report this wiki page